

Welcome to Week 3 of the Chain Link Quilt Along!
![]()
Chain Link Quilt Along is based on the free PS Quilt Pattern available to all PS Members for FREE during the month of August. If you haven’t downloaded your pdf copy yet, grab it here.
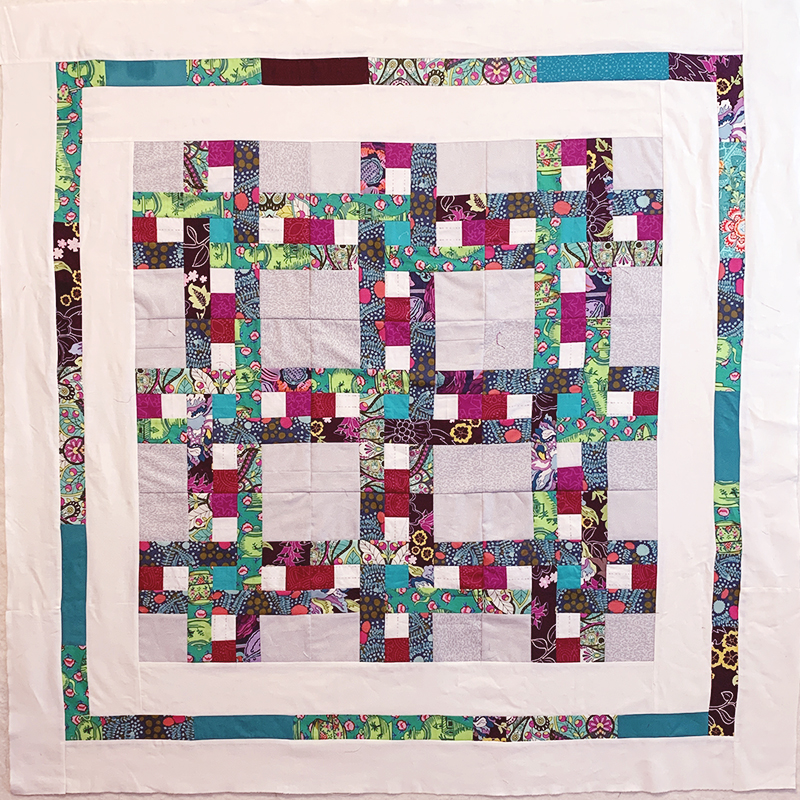
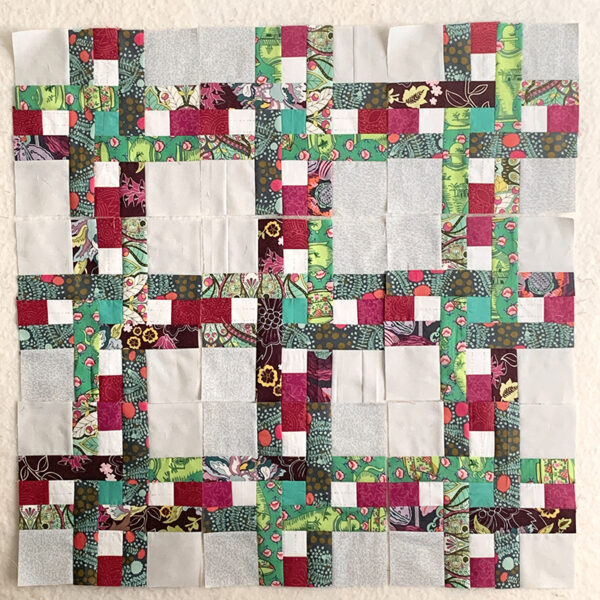
This is the size and rough color placement our binding scraps and background fabrics will create:

Timeline
We will be building this quilt, guided by this schedule:
- Week 1: Announcing QAL & Pick Fabrics
- Week 2: Cut Fabrics
- Week 3: Piece Blocks/Top
- Week 4: Quilting Color 1
- Week 5: Quilting Color 2
*Our team will only be making 9 blocks to create a baby quilt and will be omitting the classic Prairie Point Triangles around the perimeter.
Week 3: Piecing Blocks and Top
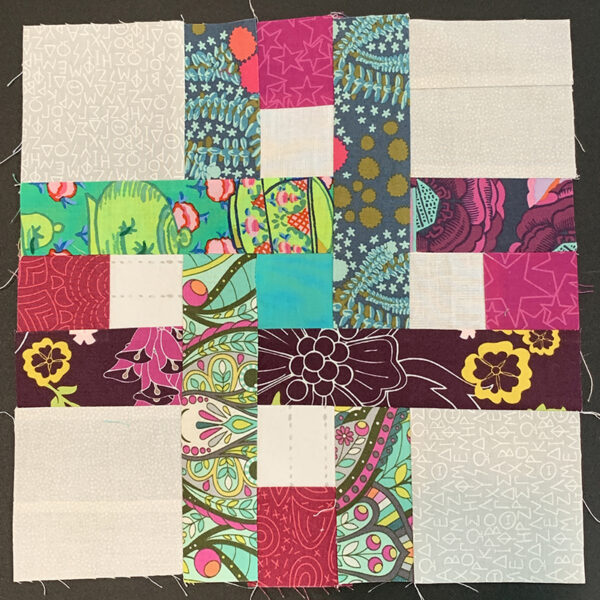
First, arrange the cut pieces how they will lay once the block is complete.
It appears as though the cut pieces will never line up. Don’t worry! That’s what the QAL is for. This block uses Partial Seam Construction.

This block uses Partial Seam Construction. This means that there are four identical quadrants and a tiny little turquoise square holding the whole block together.
Our friend, Adam, has whipped up a little video tutorial for Week 3: Partial Seams of the Chain Link Quilt Along.
Chain piece the Chain Link!
In our sample, Step 1 is completed by using a strip piecing method of joining two long strips, then subcutting them into the required size.
Step 2. Since the quadrants are identical, it is easy to join all (suggested 120) units in Step 2.
Step 3. Easy enough to join the white squares shown in each corner to the unit created in Step 2.

Step 4 is to simply add the longer colorful rectangle to the right side of each quadrant.

Step 5 is the Partial Seam Construction. It is outlined neatly in the pattern and is just as the name describes. To join the center square to quadrant 1, you will use a partial seam.
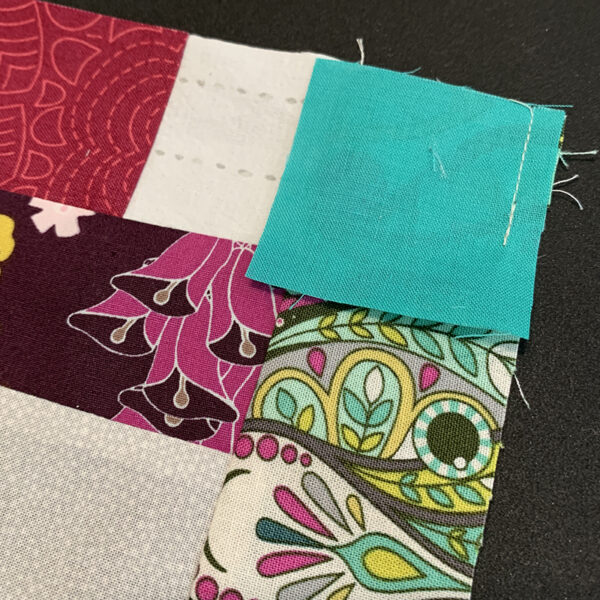
Step 6: Flip the small square open and finger press the seam allowance towards the larger quadrant. Join quadrant 2, shown on the left side of the block below.

Step 7. Attach quadrant 3 and then quadrant 4. You’ll see quadrant four has rejoined the partial seam area of the center square.
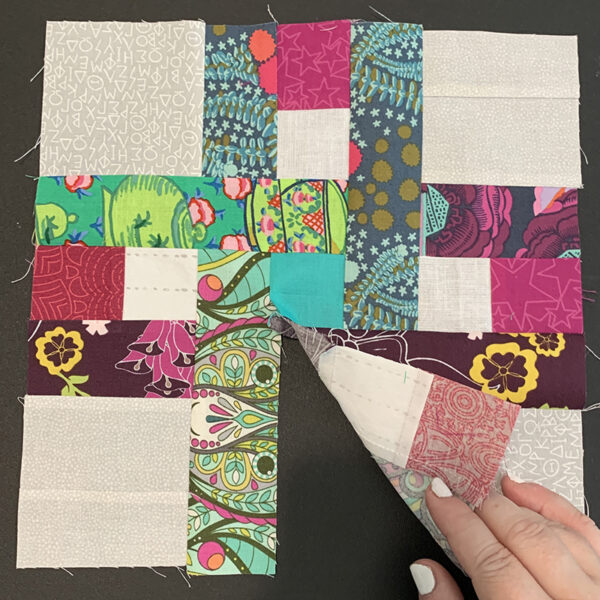
To complete the partial seam, match right sides together and begin sewing where the partial seam stops. Sew outward to the edge of the block.

Repeat
Repeat the block building steps for the remaining blocks.
Again, we opted to only make 9 blocks, though the full 30 blocks with both borders will make a wonderful bed-sized project measuring approximately 72″ x 82-1/2″.
Borders
The Chain Link Pattern recommends using leftover colorful pieces in the border arrangement.
- We added 3-1/2″ cut solid pieces as an inner border.
- Then pieced and added the scrappy middle border.
- Last added the remaining 3-1/2″ cut solid piece as the outer border.
The pattern will guide you to measure you quilt top along the way and cut your fabric for borders accordingly. (Funny how studio daylight can affect the quilt colors.)

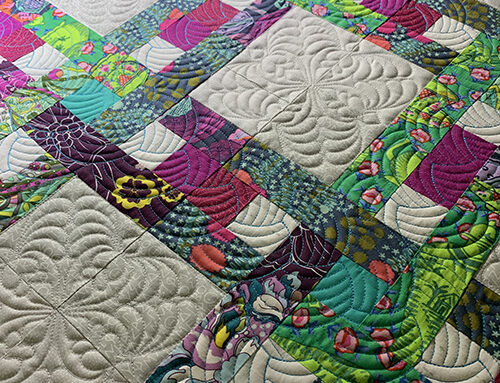
Week 4: QUILTING
Get your quilt top built. Next week we’ll share images and ideas for how to quilt this Chain Link project.
Remember to share your progress using the hashtag #chainlinkqal on social media.
We cannot wait to see your projects. Use the hashtag #prostitcher when sharing.

Content in this feed is © Copyright 2023 by Pro-Stitcher and may not be republished without written permission. You’re welcome to forward the email to a friend or colleague but it’s not okay to add the RSS feed automatically as content on a blog or other website. The FTC requires us to tell you that Pro-Stitcher has provided products by other companies in the course of doing business. The FTC requires us to advise you to take this information into consideration when reading this posting.
Leave A Comment
You must be logged in to post a comment.