
Welcome to Week 5 of the Chain Link Quilt Along!
![]()
Chain Link Quilt Along is based on the free PS Quilt Pattern available to all PS Members for FREE during the month of August. If you haven’t downloaded your pdf copy yet, grab it here.
We are on our last step: Quilting the second color and the remaining borders. You’ve got this!
Timeline
We will be building this quilt, guided by this schedule:
- Week 1: Announcing QAL & Pick Fabrics
- Week 2: Cut Fabrics
- Week 3: Piece Blocks/Top
- Week 4: Quilting Color 1
- Week 5: Quilting Color 2
*Our team will only be making 9 blocks to create a baby quilt and will be omitting the classic Prairie Point Triangles around the perimeter.
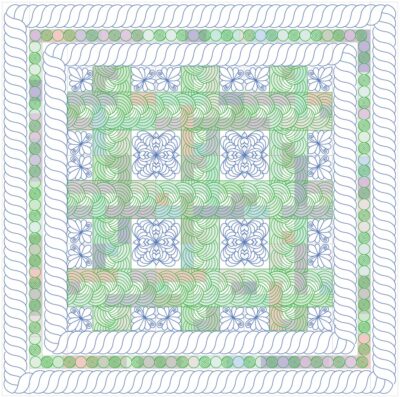
Quilting Plan
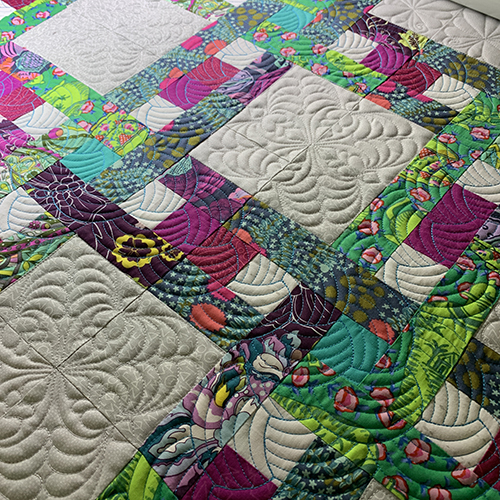
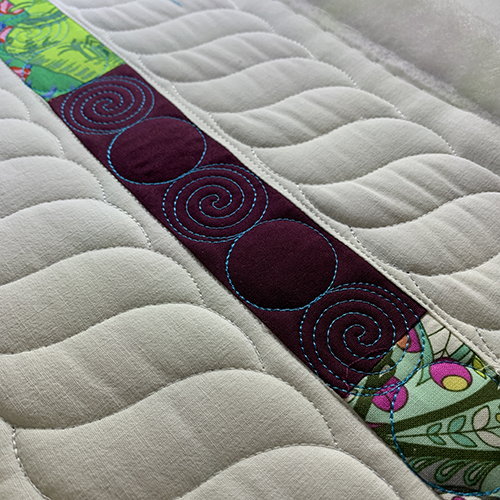
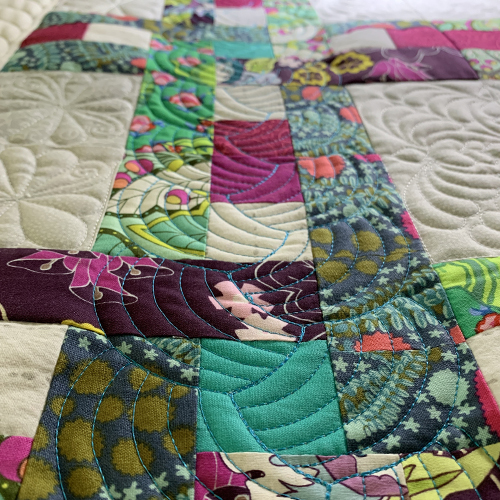
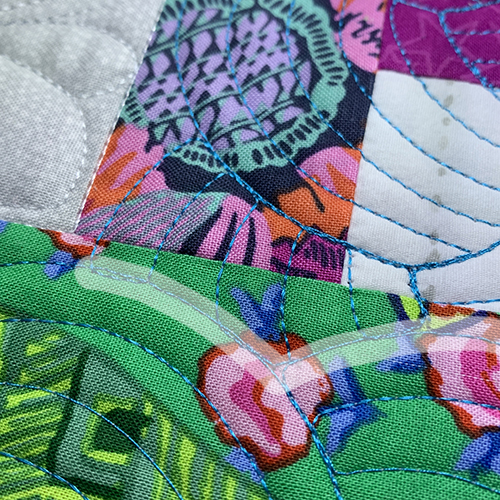
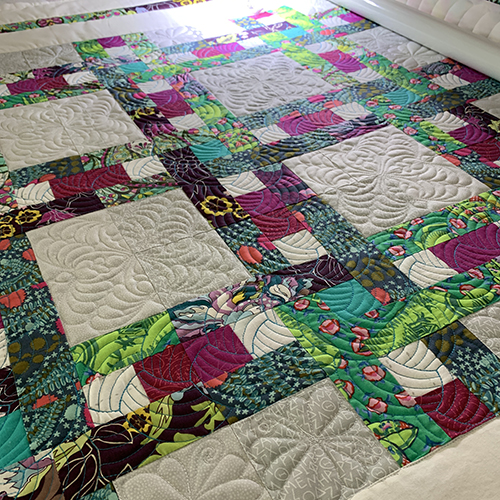
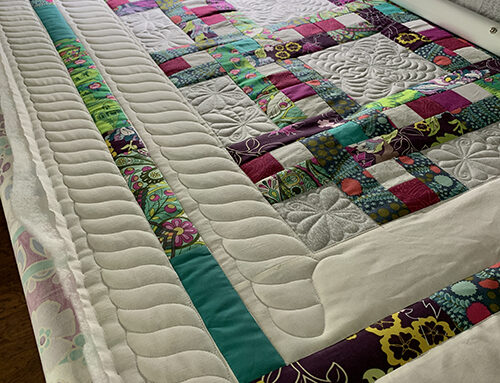
Last week, we quilted the majority of the quilt using light thread. This week, what is shown in green is what we have left + the vertical borders.
Our friend, Adam Sew Fun, has a demo for custom cropping and the second thread color featured in Step 5.
Changing Thread Color
Don’t let switching thread colors mid-project intimidate you. We are using the same brand and weight of thread for this project, so in theory the tension should be consistent.
- Cut the first thread about 6″ above the thread cone.
- Remove the first thread cone.
- Add the second thread cone in its place.
- Tie the thread ends together.
- Pull the thread through the machine and needle.
- Cut the knot and excess thread.
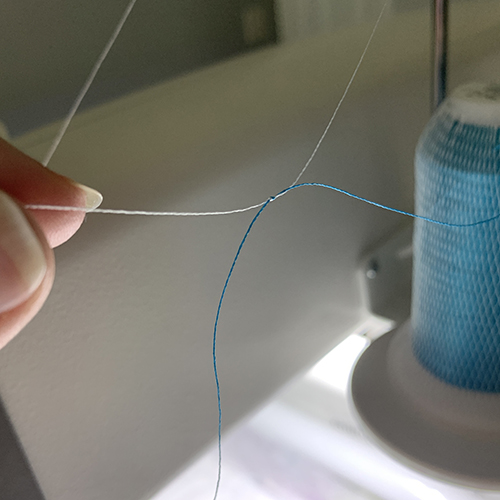
- Make sure the thread is seated in the tension disks after the pull-through method.
- Once threaded, test the quilt tension on the side of the quilt.
- Adjust as needed.
Horizontal Border
Refer to the border video if needed:
Using circles on narrower borders is great because they will always skew into place without noticeable distortion and will always make a nice corner.
- Set up the top border area.
- Open Pearls and Swirls digital design
- Modify > Resize > Lock the height and width of the selected design.
- Resize the height to fit within the area.
- Repeat > Horizontal > Fill
- Baseline
- With the entire row selected, click Modify > Skew > Border
- Baseline.
- Save.
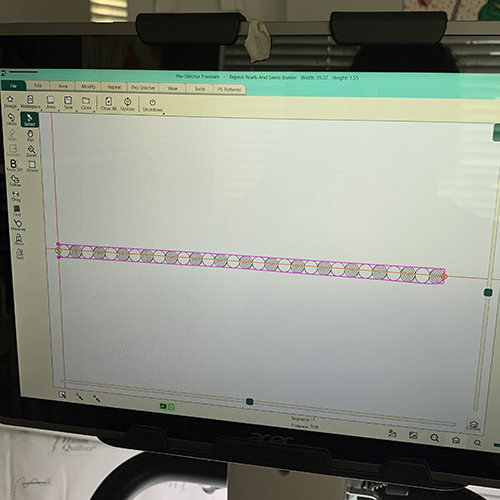
This border is ready for quilting!
Stitch this design by pressing Pro-Stitcher > Quilt > Run.
Setting Horizontal Rows
Quilt all horizontal rows with the Braided Belt Border before moving to the next areas.
- Define the horizontal space.
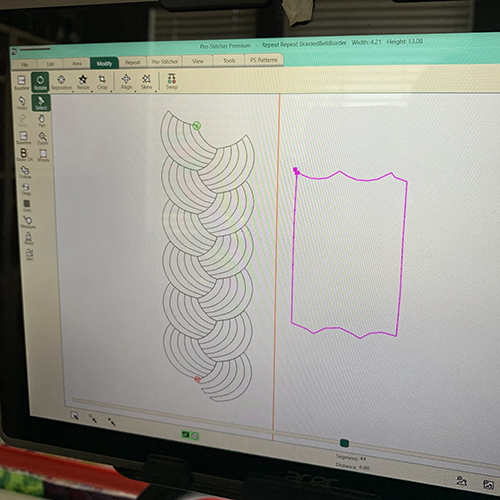
- Open the Braided Belt Border.
- Modify > Resize > Lock the height and width of the selected design.
- Resize the height to fit within the area.
- Repeat > Horizontal > Fill
- Baseline
- With the entire row selected, click Modify > Crop > Outside & Edges
- Baseline.
- Save.
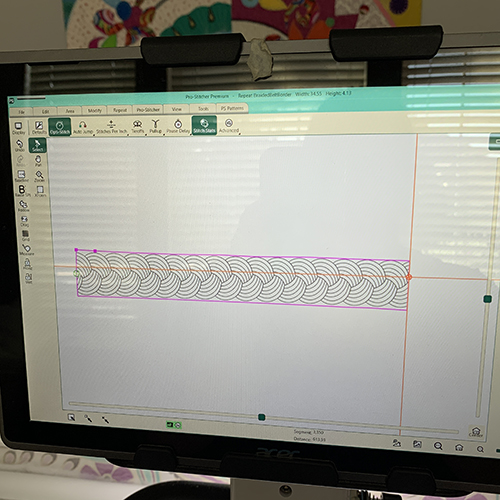
This row is ready for quilting!
Stitch this design by pressing Pro-Stitcher > Quilt > Run.
Notice the remaining vertical areas have a bit of “puff” showing. It will quilt out.
Defining Odd Shapes
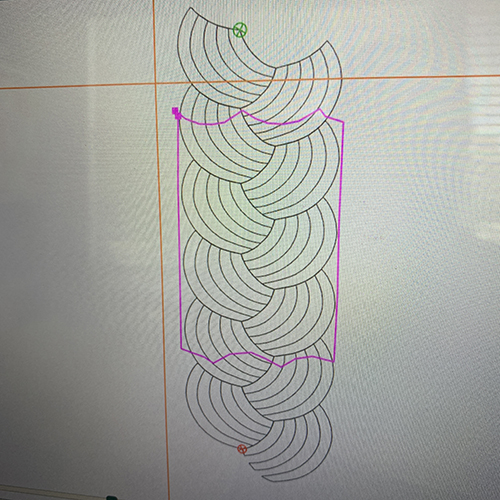
The vertical patchwork areas look like regular rectangles, however, in order to make the Braided Belt look like a woven and continuous quilted design, we’ll need to define an odd space to completely fill the space.
The area defined below is along the top edge of the quilt. It has a flat side on the top, right and left sides. It has a “wave” along the bottom edge as the area points are set exactly on the previous stitching lines. The more points you have, the smoother the curves will be.
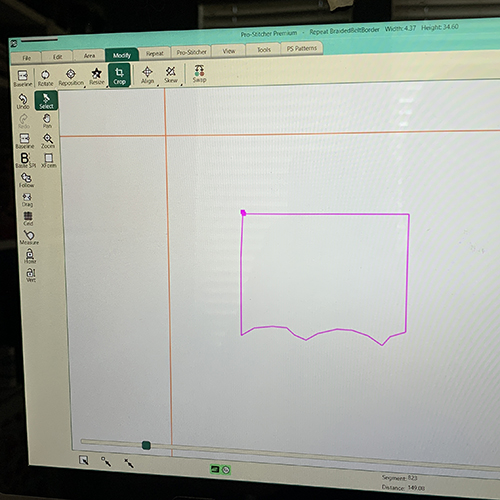
- Open the Braided Belt Design.
- Repeat > Horizontal > 3
- Baseline.
- Modify > Rotate > 45-degrees + 45-degrees (for a total of 90-degree rotation with the start point at the top of the quilt.)
- Baseline.
- Save.
- Click to select and drag the design over the area.
- Keeping the Height/Width locked, increase the size of the design to neatly fit the width of the defined area.
- Modify > Crop > Outside & Edges
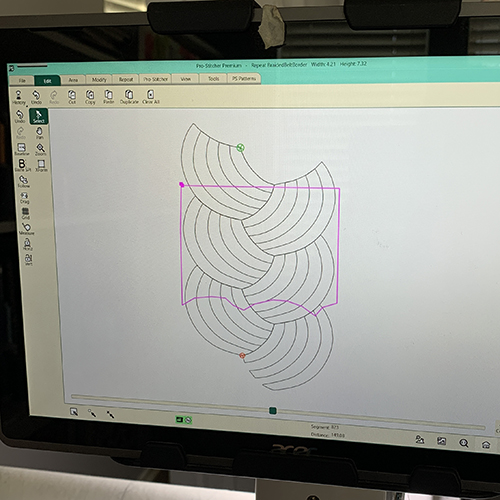
The remaining shape should look something like this:
SAVE EACH DESIGN AFTER EACH ODD-SHAPE CROP.

This vertical section is ready for quilting!
Stitch this design by pressing Pro-Stitcher > Quilt > Run.
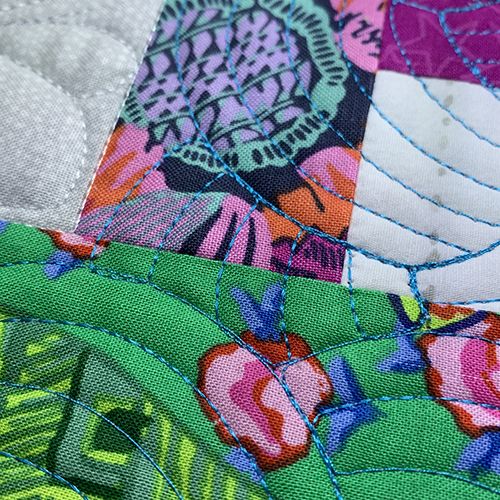
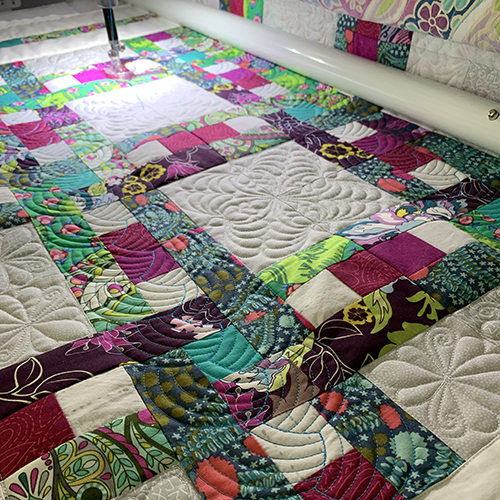
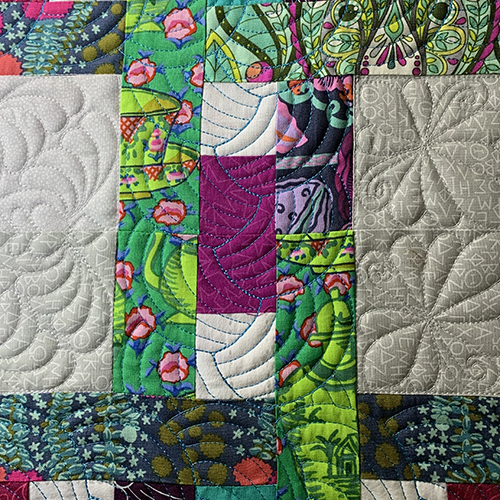
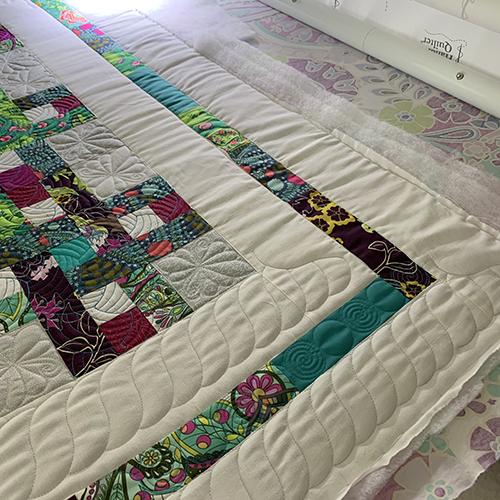
Compare the above and below pictures. The area highlighted in “white” below shows where the vertical and horizontal quilting align and overlap. The more points you create when making your odd-shaped-area, the more accurate this overlap will be.
Repeat this step for the remaining top-edge spaces.
For the interior vertical pieces, the method is nearly identical. The only difference is that the curved edges will be along the top AND bottom of the odd-shaped-area.
When cropping the design, be mindful that the curved edges may make for strange little cropped quilting lines. Move the design up or down to see if a certain placement is better than another.
While it is tricky to see the Braided Belt Border on the fabric in our Quilt Along sample, the continuous texture is 100% worth the time it takes to crop each block into place.
Repeat the steps with three straight sides, to finish the lower edge blocks. With the entire top custom quilted, it is time to rotate the quilt and finish the remaining borders.
Rotate the Quilt
Historically, this step is generally regarded as “but do I really have to do that?” The answer is, you’ll have a better looking quilt if you take the time to rotate your project for the remaining borders.
Our friend, Adam, has a video how-to for rotating the project and adding in the borders.
Once rotated, quilt the narrow borders first. The darker thread is already on your machine and the borders are stabilized, so there’s no reason not to.
- Set up the top border area.
- Open Pearls and Swirls digital design
- Modify > Resize > Lock the height and width of the selected design.
- Resize the height to fit within the area.
- Repeat > Horizontal > Fill
- Baseline
- With the entire row selected, click Modify > Skew > Border
- Baseline.
- Save.
Stitch this design by pressing Pro-Stitcher > Quilt > Run.
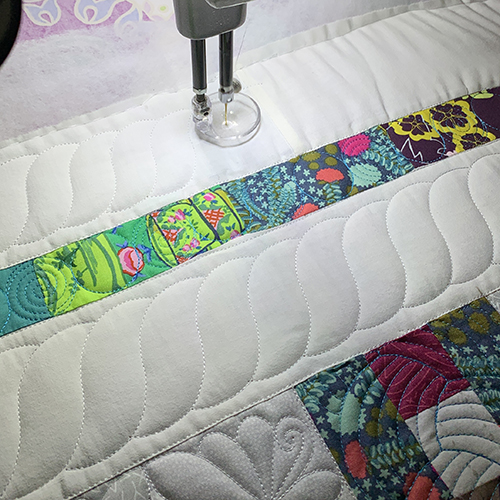
Advance the quilt to the lower edge. Quilt the lower narrow border. This is the last area to quilt in the darker thread!
Switch Thread Colors
Tie the threads together to rethread the white. Follow the same steps to pull the thread through the path.
Last Rope Borders
When defining the area for the last rope borders, make it as specific as possible by adding area points along the previously quilted corner stitching.
- Open the Rope Border Design
- Modify > Resize > Lock the height and width of the selected design.
- Resize the height to fit within the area.
- Repeat > Horizontal > Fill
- Baseline
- With the entire row selected, click Modify > Resize > Width only
- Play with the needle position relative to the start point and previously quilted corner lines to make sure the design is wide enough to suit your space.
- Baseline.
- Save.
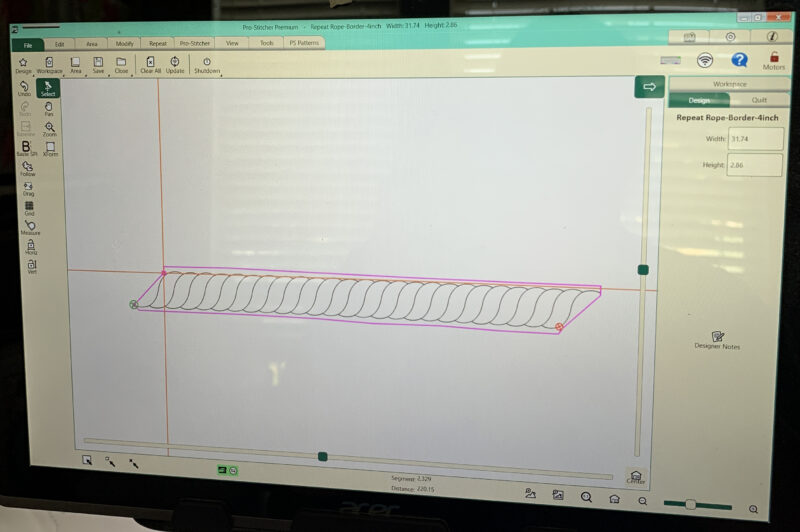
You may need to smooth the border as the Pro-Stitcher quilts along.
Advance the quilt to the bottom edge. NOTE: This Rope Border travels “clockwise” around the quilt. Do not use the mirror or flip buttons to set up the lower border. Rather use the rotate, rotate, rotate options to spin the border into place.
Binding
If you add binding by longarm quilting machine, to finish by hand, you’ll add it now.
Congratulations!
The quilting is finished! Remove the quilt from the longarm frame, trim, and bind.
The last step is finishing the binding. Of course, if you don’t apply the binding in a timely fashion, we won’t tell anyone. (*wink wink*) We are so glad you joined us to quilt this Chain Link Quilt Pattern.
Thank you so much for joining us on this quilt along. If you were not able to quilt with us in real time, just know you can always go back to the pattern and reference our blog notes as you sew your very own Chain Link quilt.
We cannot wait to see your projects. Use the hashtag #prostitcher when sharing.

Content in this feed is © Copyright 2023 by Pro-Stitcher and may not be republished without written permission. You’re welcome to forward the email to a friend or colleague but it’s not okay to add the RSS feed automatically as content on a blog or other website. The FTC requires us to tell you that Pro-Stitcher has provided products by other companies in the course of doing business. The FTC requires us to advise you to take this information into consideration when reading this posting.
Leave A Comment
You must be logged in to post a comment.