

Welcome to Week 4 of the Chain Link Quilt Along!
![]()
Chain Link Quilt Along is based on the free PS Quilt Pattern available to all PS Members for FREE during the month of August. If you haven’t downloaded your pdf copy yet, grab it here.
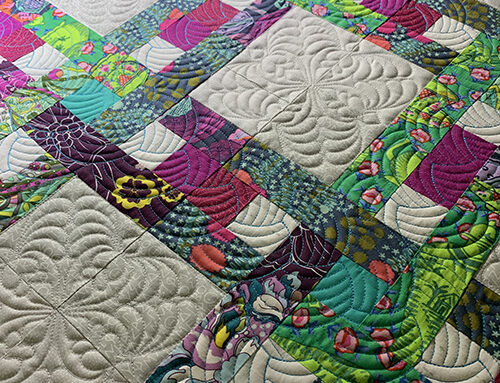
Week 4 is ProStitcher.com’s FAVORITE: the quilting😍😍
Timeline
We will be building this quilt, guided by this schedule:
- Week 1: Announcing QAL & Pick Fabrics
- Week 2: Cut Fabrics
- Week 3: Piece Blocks/Top
- Week 4: Quilting Color 1
- Week 5: Quilting Color 2
*Our team will only be making 9 blocks to create a baby quilt and will be omitting the classic Prairie Point Triangles around the perimeter.
Adam Sew Fun has a quick video with tips on how to quilt this week’s portion of the Chain Link Quilt Along.
Thread Colors
Can you quilt your project completely in a single thread color? Yes, of course. We are opting to use two different threads to compliment the dramatic contrast in light and dark fabrics on our project.
Our selected thread colors are Magnifico by Superior Threads colors #2142 (teal) and #2164 (white)
Quilting Plan
Per the pattern suggestions, we will be quilting this project with the suggested digital designs and arranging them as shown in the pattern. All designs listed/used are by PS Patterns and are eligible for the PS Membership.
- Braided Belt Border from Framed Star Quilt Project
- Double Triangle Feather from Framed Star Quilt Project
- Perfectly On Point from Framed Star Quilt Project
- Rope Border
- Rope Corner
- Pearls and Swirls Border
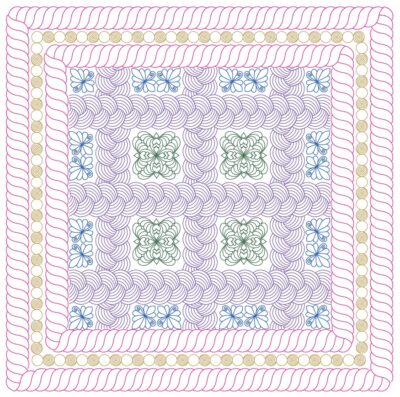
NOTE: This arrangement creates a densely quilted project.
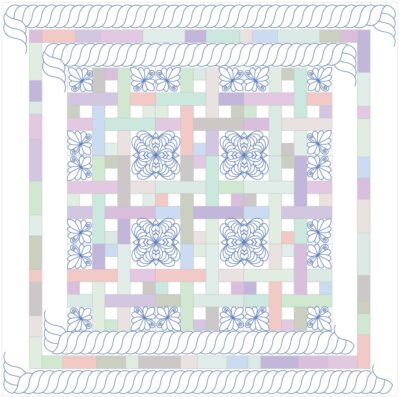
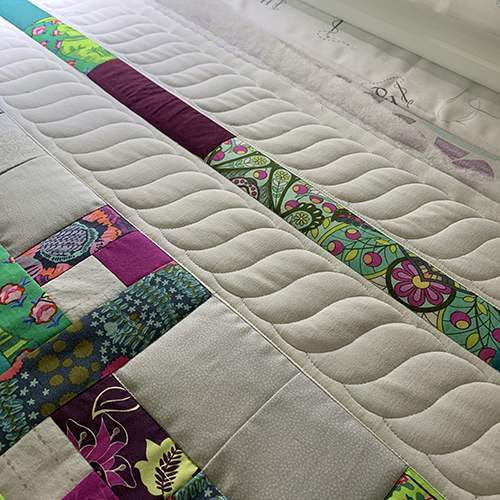
Thread Color 1
With thread color 1 (white) we will quilt these items:
Before we begin with digital designs, baste the quilt in place.
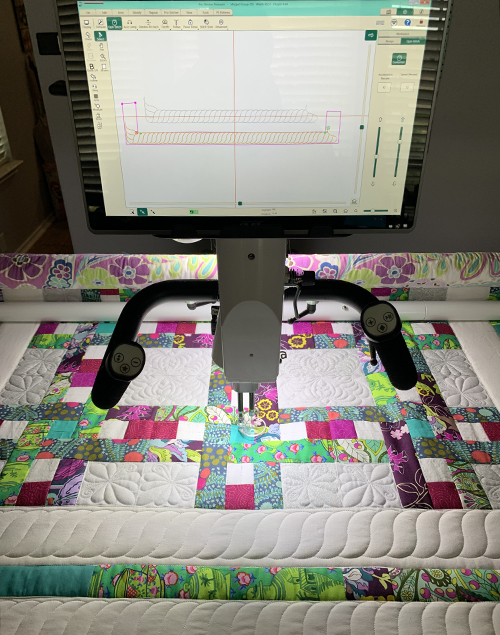
Use the Pro-Stitcher > Record > Mark tool to record a line along the seam. This recorded line will allow you to “stitch in the ditch” and define the space without using rulers. Learn more about the Record > Mark tool, here.
Rope Corner and Border
Please refer to this video on Setting Up Borders and Corners to help with this step.
We first set up the area in which we’d like to place our first Rope Border and Corner. Follow the directions in the video above to place the rope neatly within the allowed space and add the corners to the right and left sides.
Baseline and Save this design.
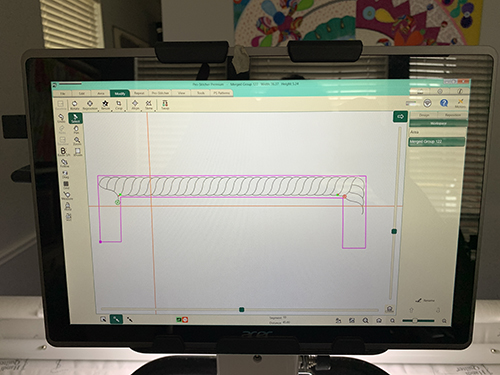
Stitch this design by pressing Pro-Stitcher > Quilt > Run.
Repeat these steps to add the second border.
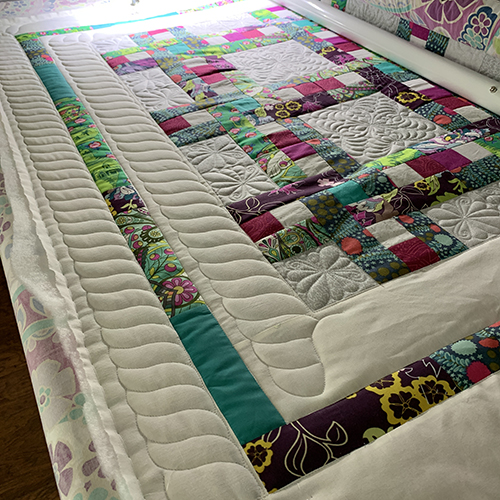
Notice the print fabric (narrow) border is unstitched. This will be completed in Week 5, with darker thread.
Customized Blocks
Refer to this video using the SKEW feature to set the custom block arrangement.
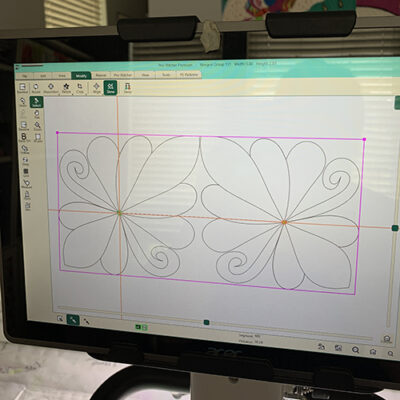
Moving down the quilt, first add the two single corner blocks, Perfectly On Point.
- Create an area outlining the space in which you’d like to quilt the block.
- Open the block.
- With the block selected, click Modify > Skew.
- When the block pops into the pink defined space, it is ready to quilt.
Stitch this design by pressing Pro-Stitcher > Quilt > Run.
Repeat for the other top corner.
With the rectangle blocks, two instances of the block above are used as one.
- Open two instances of the block.
- Place their large feather points touching each other.
- Baseline.
- Save.
- Use this as a single block with one jump for the rectangles around the quilt’s edges.
Repeat the same area – block – skew steps to place the block.
Stitch this design by pressing Pro-Stitcher > Quilt > Run.
Repeat quilting the rectangles along the top edge.
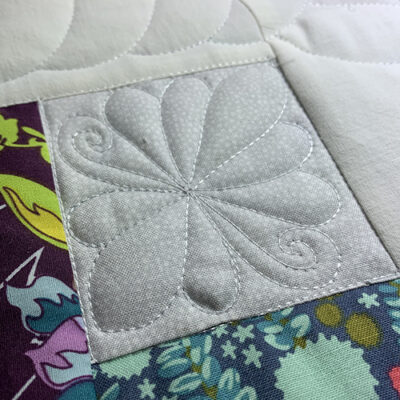
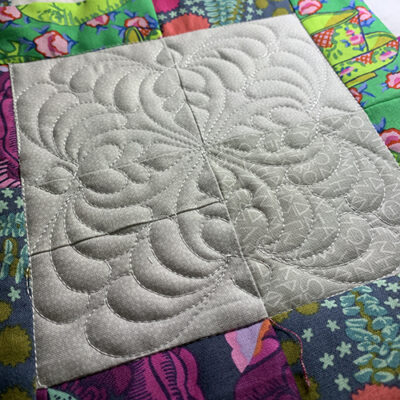
Advance the quilt and use Pro-Stitcher > Record > Mark to outline the negative space 4-patch block, as shown below.
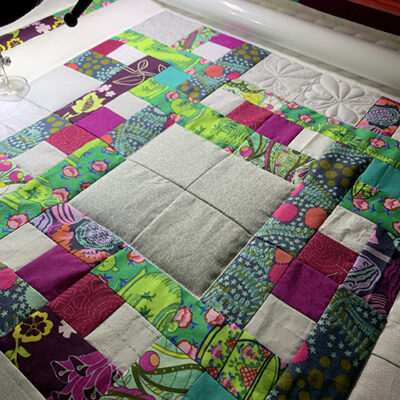
Just as the rectangles used two blocks as one, the larger square does as well.
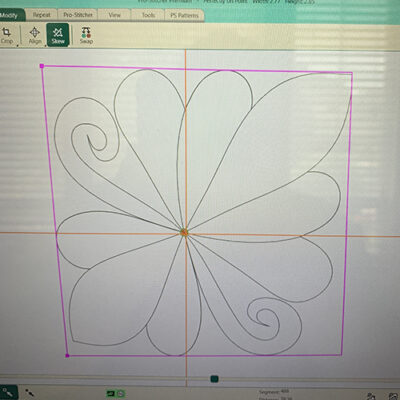
The Double Triangle Feather block is intended to be used in triangle setting blocks. However, we are maximizing our Framed Star design bundle and using this design as a square.

In Pro-Stitcher, open and then select this design.
- Edit > Copy
- Edit > Paste
- With only the second instance selected, click Modify > Rotate > Flip
- Click and drag the flipped design to be directly below the first instance.
- Baseline.
- Save as new design name.
- Modify > Rotate > 45-degrees
Those steps should yield a nice square block which you can then create an area to drop this baby in place.
See the jump between the two designs in the image below? Not a problem. Allow the machine to make that jump and trim the threads later.
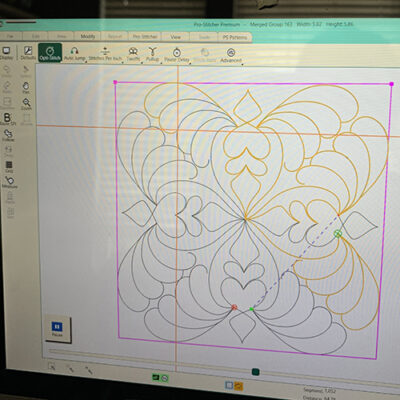
The block will be tightly quilted.
Repeat the block placement, skew, and stitch out for the remaining blocks.
Advancing The Quilt
As you advance the quilt, remember to quilt the rectangle blocks along the edges.
When you advance, also remember to stitch-in-the-ditch along the outer borders. This will keep the borders in place while we work down the project and will make it easier to have nice straight borders when we rotate the quilt 90-degrees in Week 5.
Bottom Borders
The bottom borders are applied in the same manner as the top borders. Notice both sets of borders are open in the Pro-Stitcher workspace below. Pro-Stitcher will only quilt the items selected. By leaving the first-of-two lower borders, it helps give a spatial relative gauge. It is not necessary, and it doesn’t hurt anything.
NOTE: This border travels “clockwise” around the quilt. Do not use the mirror or flip buttons to set up the lower border. Rather use the rotate, rotate, rotate options to spin the border into place.
Notice the print fabric (narrow) border and vertical side borders are unstitched.
Week 5 – QUILTING Color 2
Quilt these elements in your first thread color. Next week we’ll dig into the second color, which will finish Chain Link project.
Remember to share your progress using the hashtag #chainlinkqal on social media.
We cannot wait to see your projects. Use the hashtag #prostitcher when sharing.

Content in this feed is © Copyright 2023 by Pro-Stitcher and may not be republished without written permission. You’re welcome to forward the email to a friend or colleague but it’s not okay to add the RSS feed automatically as content on a blog or other website. The FTC requires us to tell you that Pro-Stitcher has provided products by other companies in the course of doing business. The FTC requires us to advise you to take this information into consideration when reading this posting.
Leave A Comment
You must be logged in to post a comment.