
 Multifarious Dream Big Poinsettia Options
The Hoffman company has hit it out of the park again with the Dream Big Poinsettia panel! One of ProStitcher.com’s designers, A Bit Orange, created this fantastic digital collection to compliment the panel.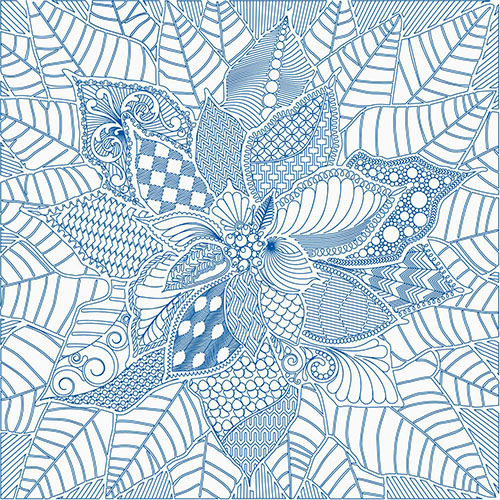
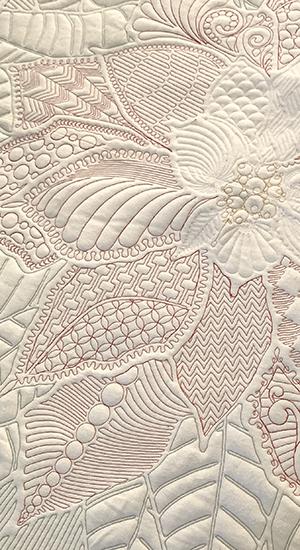
Quilted by Jane Prestidge
After watching Adam Sew Fun’s Youtube tutorial and trick for using this design, we decided to try it as a wholecloth with no gorgeous panel in the background.
NOTE:
Pro-Stitcher is the only place to buy .hqv file extensions, compatible with the Pro-Stitcher longarm robotic system. The quick magic is in using the .hqv, though this look can probably also be achieved through careful design placement. Shop the Multifarious Dream Big Poinsettia. If your longarm system also recognizes the 0,0 placement, let us know!
Our Process
First, baste the entire “blank” top to the batting and backing loaded on your longarm frame. Because this was a test piece, there’s actually a seam running through the top.
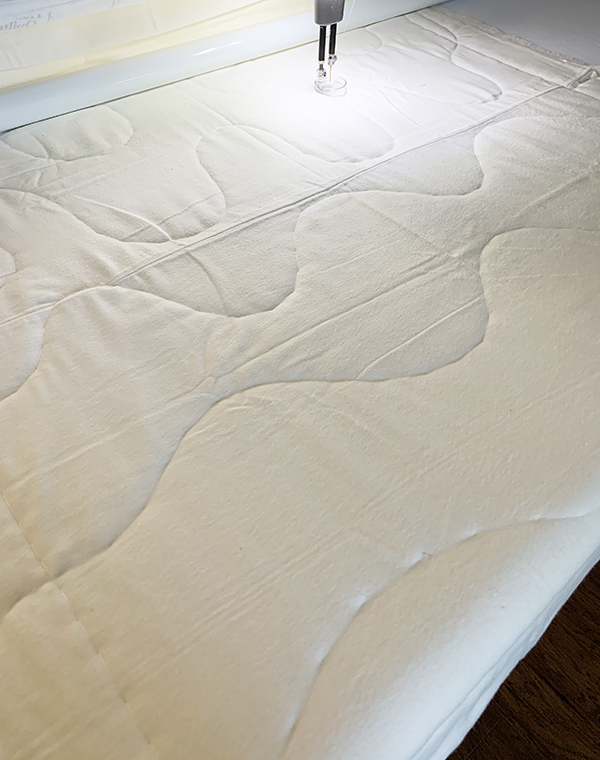
Our team opened all the design files in PS Designer software, copied and pasted them into one file. The software allows the designs to maintain their original location as it relates to the 0,0 axis.
Fun Fact: PS Designer is a stand-alone product that creates quilting files in all digital quilting formats. It is easy to use and a fraction of the price of competitor software.
Once all the designs were positioned in a single file, we organized the list of designs to make sure they stitched from the center outward. Save and send to the longarm via USB stick.
Quilt
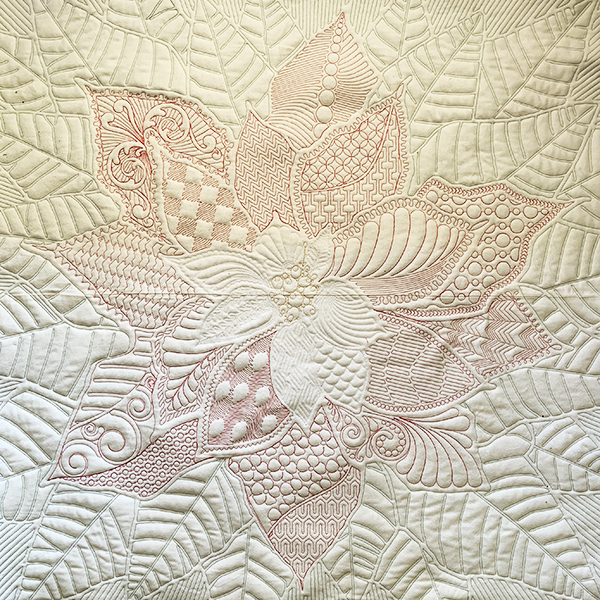
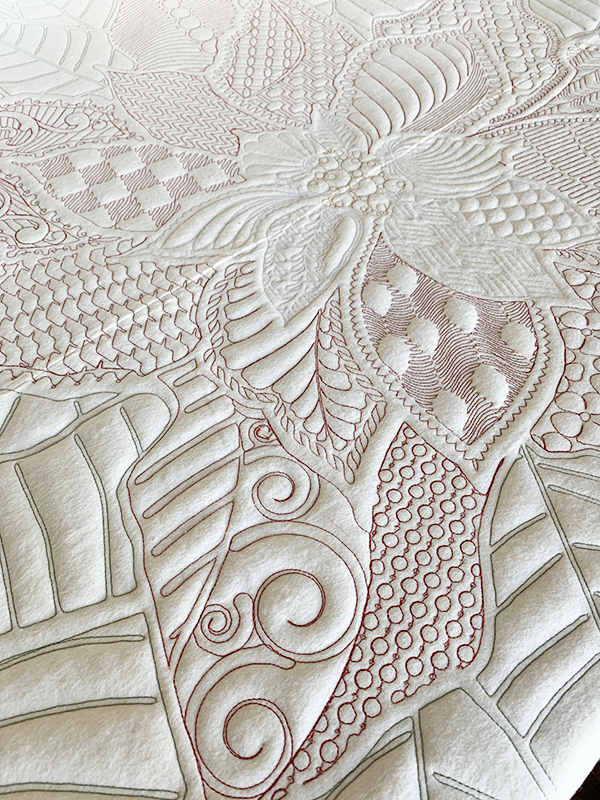
For our system, we made sure that the longarm would not jump to the next design. Your settings will vary, but for Pro-Stitcher, set your jump to zero. This will allow you to advance the quilt if needed at any point in the stitchout. It also gives an opportunity to switch thread colors. We’ve used three colors, gold, white, red, and green.
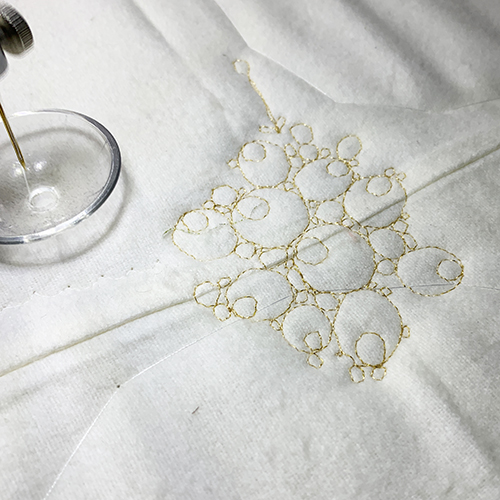
Start in the center with metallic gold thread.
Switch to the next color. We opted for white. Stitch a select group of petals toward the center. Which ones are completely up to you.
Once a few white petals are in place, switch to red thread to finish out the flower design.
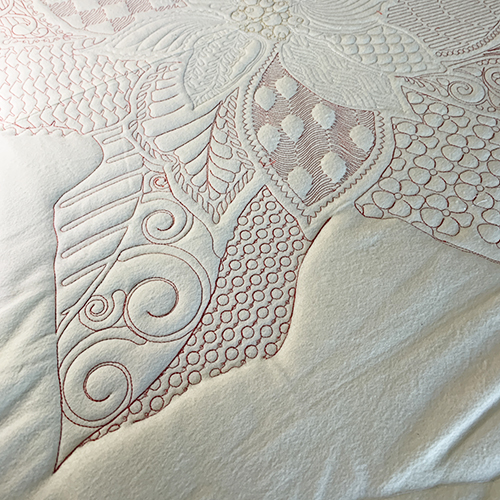
Last step: Lay in the green background leaves.

Finish
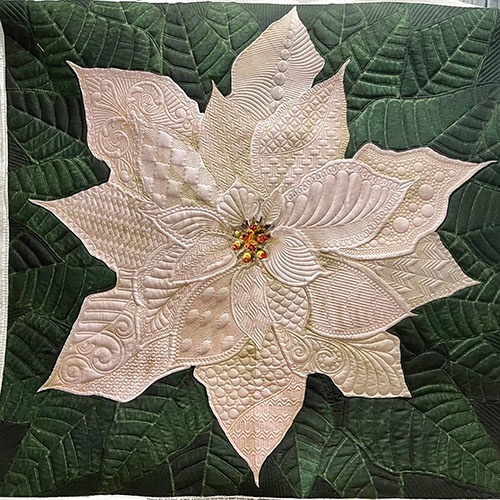
While this sample is quilted at 30″ x 30″, we think the possibilities to create a HUGE wholecloth poinsettia will only be limited by your throat space. For our design, we’ll apply a facing to the design to create a wall hanging for the winter poinsettia season.
We cannot wait to see your projects. Use the hashtag #prostitcher when sharing.

Content in this feed is © Copyright 2023 by Pro-Stitcher and may not be republished without written permission. You’re welcome to forward the email to a friend or colleague but it’s not okay to add the RSS feed automatically as content on a blog or other website. The FTC requires us to tell you that Pro-Stitcher has provided products by other companies in the course of doing business. The FTC requires us to advise you to take this information into consideration when reading this posting.
Leave A Comment
You must be logged in to post a comment.