
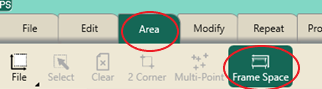
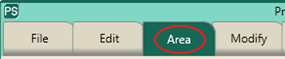
1.1 Set Up Frame Space
- Select Area tab.
- Press Frame Space on the ribbon.
- Move machine to the top left corner of your frame space.
- In the sidebar, press 2 Corner.
- Move machine to the bottom right corner of your frame space.
- In the sidebar, press 2 Corner.
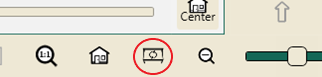
- Press Refresh to Frame Space in the bottom right corner of your screen to see your entire frame space, design and crosshairs in your workspace.
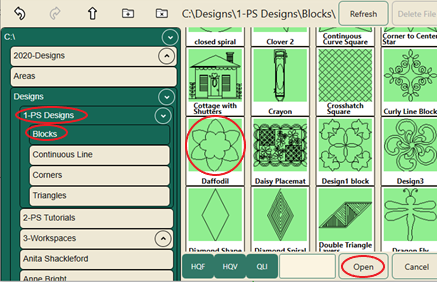
1.2 Select a Design
- Select File tab.
- Press Design on the ribbon.
- Press Open.

- Select Designs/1-PS Designs/Blocks/Daffodil
- Press Open.
1.3 Create an Area
- Select Area tab.
- Move machine to the top left corner of the quilt block.
- Press 2 Corner on the ribbon.

- Move machine to the bottom right corner of the quilt block.
- Press 2 Corner on the ribbon.
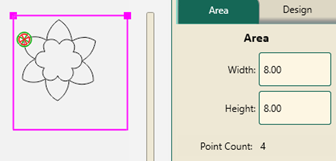
- Press Refresh in the status bar at the bottom right of the screen.
- The area, design and crosshairs will be visible in the workspace window.

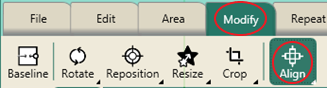
1.4 Align Design
- Select Modify tab.
- Press Align on the ribbon.
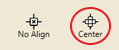
- Press Center in the sidebar.
1.5 Rotate Design
- Press Rotate on the ribbon.
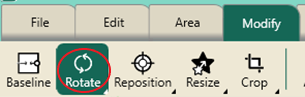
- In the sidebar, press 45 to rotate counterclockwise twice.

- Press Baseline in the Quick Access Toolbar.

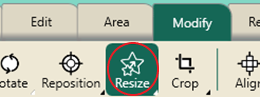
1.6 Resize Design
- Press Resize on the ribbon.
- In the sidebar, select Lock and Width.
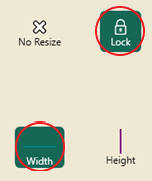
- Use the plus and minus buttons in the bottom of the sidebar to adjust the block size to fill the area.

- To fine-tune the size, you can un-select the Lock button and just change the height or width.
- Select Baseline.
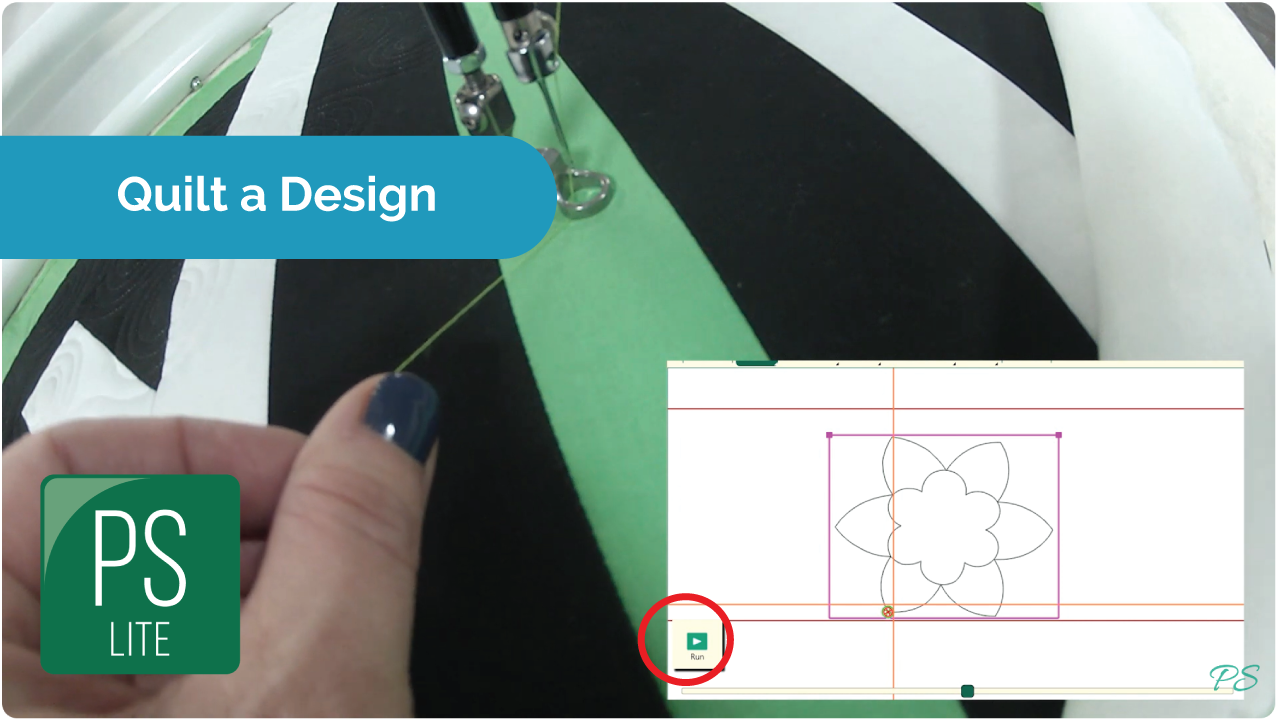
1.7 Stitch Design
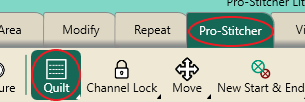
- Select Pro-Stitcher tab.
- Press Quilt on the ribbon.
- In the sidebar, choose settings:
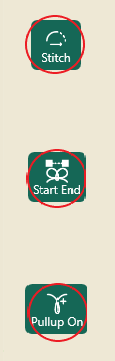
- Select Stitch.
- Select Start End.
- Select Pullup On.
- Press Run.

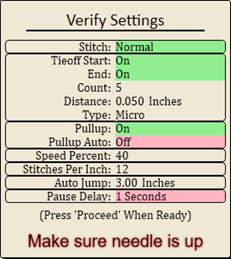
- Verify Settings.
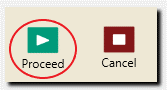
- Press Proceed.
- The machine will take one stitch and pause.
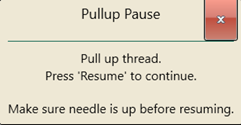
- Pull up your bobbin thread.
- Press Resume.

- When finished stitching, pull up bobbin thread and clip your threads.