
How to: Using a Pantograph
Easily print, assemble, and use the paper pantograph to quilt from the back of your longarm quilting machine. Add beautiful quilting from Pro-Stitcher‘s Print At Home designs collection.
Supplies:
- Print At Home File
- Clear Tape
- Fine Tip Marker

Design Prep
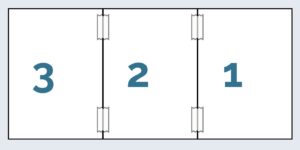
Print as many pages as needed to span the width of your quilt as it is loaded on the longarm frame.
In reverse page number order, tape pages together with clear tape abutting page edges and adding as many pages as needed to achieve the desired length.
Draw any missing line segments with a fine-tipped marker.
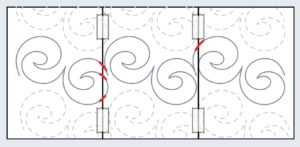
Pro-Stitcher pantographs are conveniently marked with partial rows above and below the repeated design for easy alignment and advancement of the quilt.
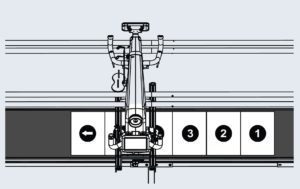
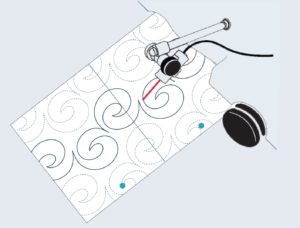
Working from the back of the frame, align the pantograph with the pattern on your quilting frame per the manufacturer’s instructions. Orient page 1 to the right of the workspace. Page numbers should be closest to the quilter.
Align and Quilt
Ensure the pantograph laser or stylus is comfortable and securely positioned per manufacturer’s directions before marking the right and left edges of the quilting area or adjusting the pantograph position.
NOTE: Before stitching, trace the design with your finger to become familiar with the path.
Tips
- Use your body to stabilize your arms to avoid shaking.
- Relax your hands while you hold the handles; don’t grip too tightly.
- Remember, people will see your finished quilt, not the original pantograph. Mistakes happen and accuracy comes with practice.
- Remember to relax, breath, blink and HAVE FUN!